 0413 107 893
For the past couple of years Shopify became one of the most popular e-commerce platforms. Mostly because of its ease of use and integrations. However, not everything is that straight forward or well documented - especially when it comes to setting up purchase conversions on Google Ads.
Google Ads conversion tracking is a powerful tool that allows you to track the performance of your ads and measure your return on investment (ROI). By tracking conversions, you can see which keywords, ads, and landing pages are driving the most sales and optimise your campaigns accordingly.
If you're using Shopify, there are a few different ways to set up Google Ads conversion tracking. In this blog post, we'll walk you through the steps involved in each method.
Method 1 - Google & Youtube App
Installing Google & Youtube App is the easiest way, as the conversion action will be set up automatically. The Google Ads Shopify App is a free app that you can install from the Shopify App Store.
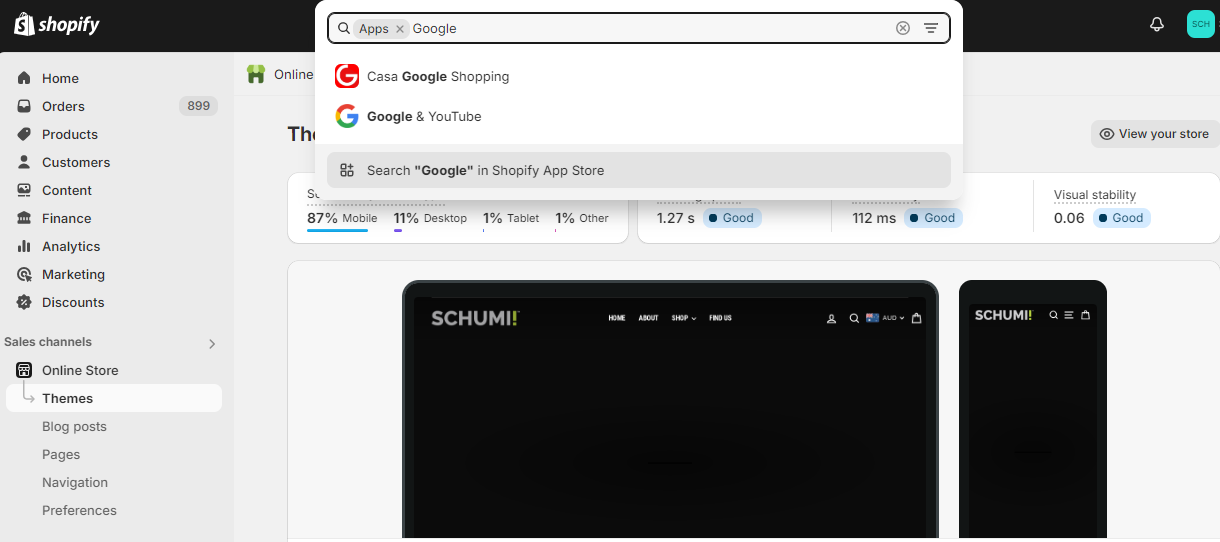
To install the Google Ads Shopify App, follow these steps:
- Go to the Shopify App Store.
- Search for "Google Ads."
- Click on the "Add app" button.
- Follow the prompts to install the app.
Once the app is installed, you'll need to connect your Google Ads account.
Method 2: Using the Google Ads Conversion Tracking Tag
If you can't use the Google and Youtube App, you need to set everything up in the old fashioned way - by installing code. The Google Ads Conversion Tracking Tag is a piece of code that you can add to your Shopify store. This code will track when a visitor clicks on one of your ads and completes a conversion on your site.
To add the Google Ads Conversion Tracking Tag to your Shopify store, follow these steps:
- Log in to your Google Ads account.
- Click on the Tools & Settings tab.
- Under "Measurement," click on Conversions.
- Click on the "+" button to create a new conversion action.
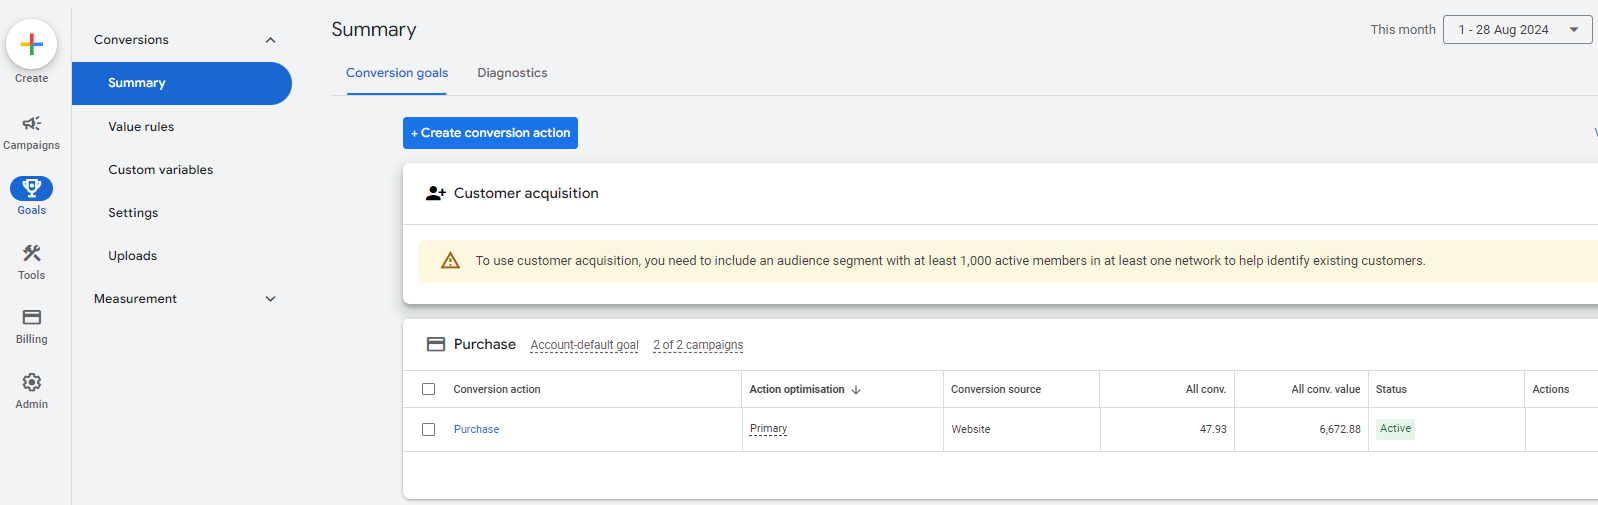
- Choose Website as the conversion action type.
- Enter a name for your conversion action.
- Choose the Category that best describes your conversion action.
- Under "Value," enter the average value of a conversion.
- Under "Currency," choose your currency.
- Under "Conversion window," choose the length of time you want to track conversions.
- Under "Attribution model," choose the attribution model you want to use.
- Click on Save and continue.
- Under "Tag setup," choose Manual setup.
- Copy the conversion tracking tag code.
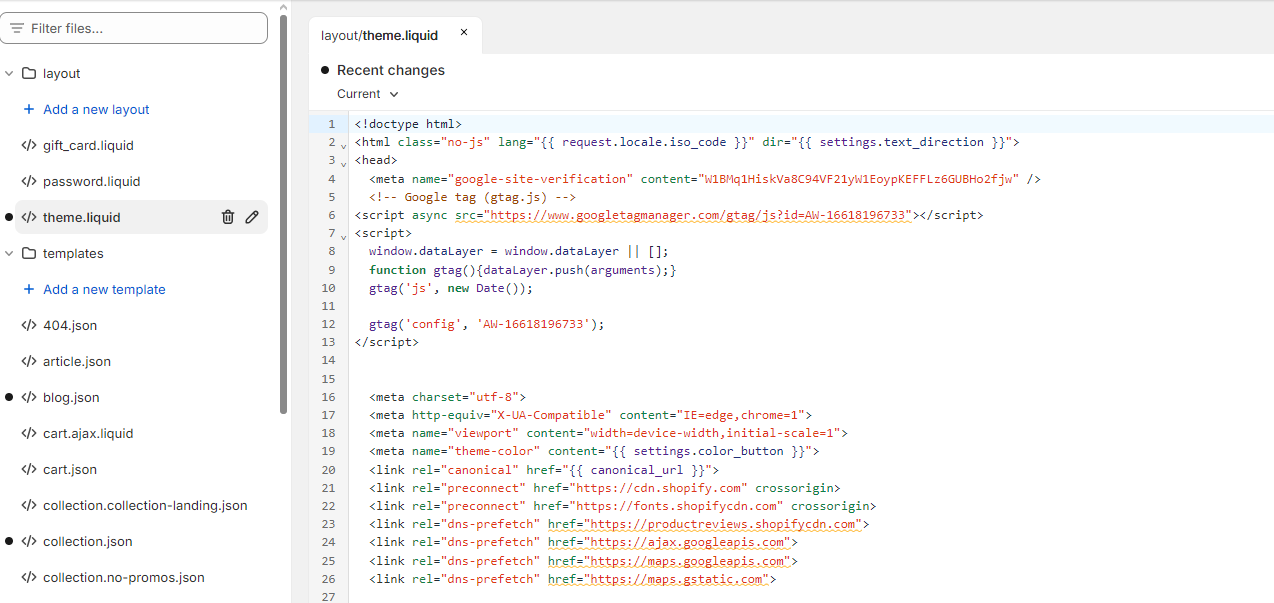
- Log in to your Shopify admin.
- Go to Online Store > Themes.
- Click on the Actions menu for your active theme and select Edit code.
- Paste the conversion tracking tag code into the
<head>section of your theme'stheme.liquidfile. - Click on Save.
This is just a first part, second is installing code on checkout page. In order to do so, you need to access settings > checkout and scroll down to "Additional Scripts" section.
Although it says "deprecated" this still works fine.
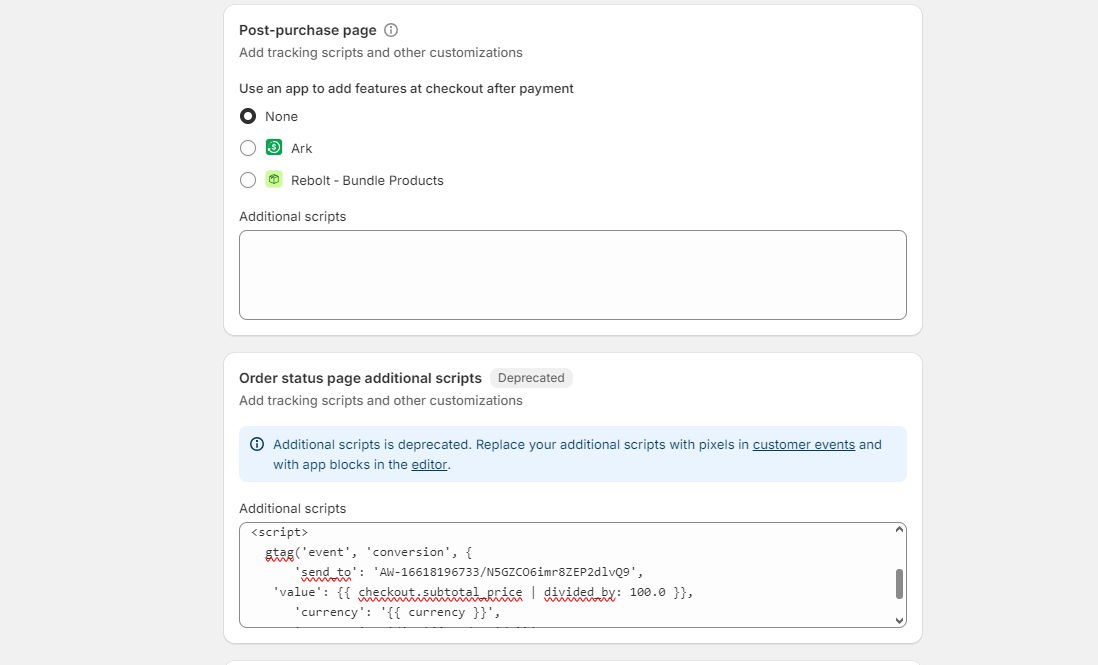
In this section you need to add your conversion code from Google Ads (you need to replace AW-YOURGOOGLETAG, with your tag info).
Code below allow you to track conversion value in Google:
{% if first_time_accessed %}
<!-- Event snippet for Purchase conversion page -->
<script>
  gtag('event', 'conversion', {
      'send_to': 'AW-YOURGOOGLETAG',
    'value': {{ checkout.subtotal_price | divided_by: 100.0 }},
      'currency': '{{ currency }}',
      'transaction_id': '{{ order_id }}',
    });
  </script>
{% endif %}
Important: After implementing the code, you have to wait for could of hours and make sure that your conversion action will have "Verified" status in Google Ads.
Method 3: Using a Third-Party Conversion Tracking Tool
There are a number of third-party conversion tracking tools that you can use with Shopify. Unfortunately most, if not all of them will be paid, so we would a bit more cost effective method (either 1st of 2nd). These tools can provide you with more advanced features than the built-in Google Ads conversion tracking.
Some popular third-party conversion tracking tools include:
- Segment
- Mixpanel
- Amplitude
Additional Tips
Once everything is set up, you need to test if this is working properly. If your conversion has "unverified" for more than a day - most likely, something has not been configured properly. You need to follow the steps described above again, use an alternative method or simply contact our google ads managers here, we are always happy to help.